Introduction #
When content is set to private whether through memberships, course enrollment, or access groups, it’s important to clearly communicate why access is restricted and what the member should do next.
This guide walks you through configuring the Default Restricted Message that appears when members encounter locked content inside your Learndash App. You’ll learn how to customize the title, message, button behavior, and teaser preview to keep the user experience smooth and on-brand.
Configuring the Default Restricted Message #
- In your WordPress Dashboard, go to Learndash App > Settings > Access Controls > General.

- Under Default Restricted Message, fill out the following fields:
- Click Save Changes.
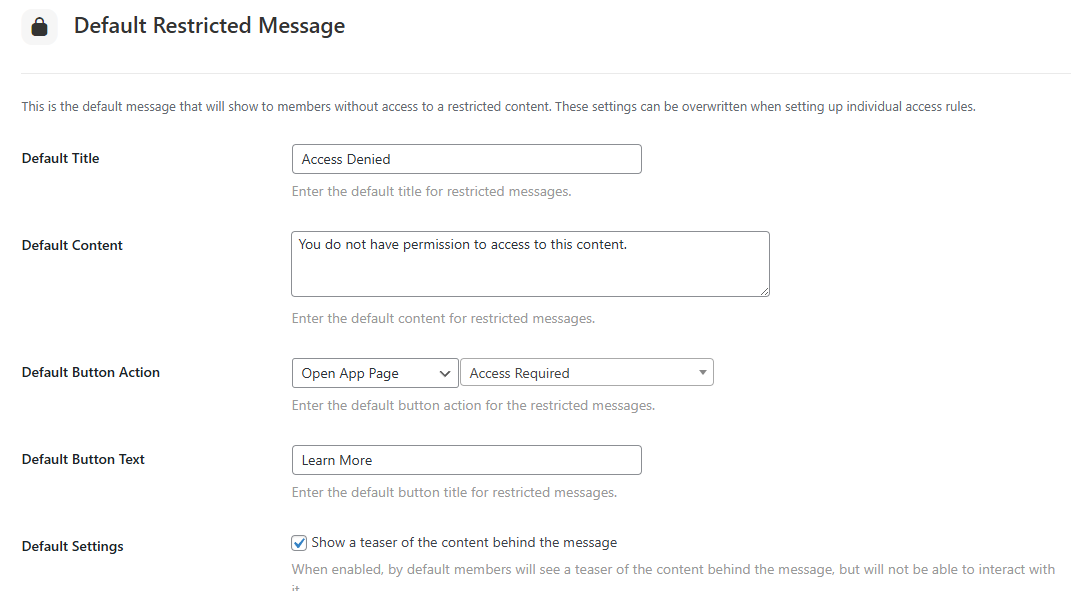
Note: Any individual Access Rule can override the default message with its own custom title, message, button, and teaser settings.
Troubleshooting and FAQs #
Q: Why isn’t the new default message showing in the app?
A: Force-close and reopen the app to clear its cache and fetch the updated settings.
Q: Can I set a different message for a specific page or rule?
A: Yes. Go to that Access Rule and enable Custom restricted message to override the default.
Q: Teaser previews aren’t displaying.
A: Ensure Show Teaser is enabled in your Default Message settings and that it hasn’t been disabled in the specific Access Rule.
Q: Can I remove the button entirely?
A: Yes. Select No Button under the Button Action field to display only the message.
Q: Will changing the default message affect existing Access Rules?
A: Only those using the default configuration. Rules with custom messages will remain unchanged.