LearnDash’s Restrict Content Pro integration allows you to provide access to courses when a user signs up for a membership plan (i.e. level) using the Restrict Content Pro software. Since you can directly associate courses with membership levels, this integration essentially provides another method for you to sell your courses.
To do this you will need the paid version (“Restrict Content Pro”), as the free plugin (“Restrict Content”) does not provide a LearnDash integration.
Restrict Content Pro is not required to sell LearnDash courses, but is one of several integrations we offer to provide a more robust ecommerce and/or membership experience for your users.
NOTE: Both the LearnDash and Restrict Content Pro plugins need to be installed & activated to use the “Restrict Content Pro for LearnDash” plugin.
Why Use Restrict Content Pro? #
A few reasons why you might want to use Restrict Content Pro (RCP) to sell your courses:
- Automatically grant access to a LearnDash course (or courses) when someone joins a membership level
- Provide a more robust checkout experience using any combination of several payment gateways supported by RCP
- Offer coupons or discount codes
- Sell courses in a bundle (i.e. one price provides access to multiple courses)
- Sell access to courses as an ongoing subscription
Learn more about all of Restrict Content Pro’s features
Installation #
Option 1: Add-ons Menu (requires an active LearnDash license) #
In your WordPress admin area, go to LearnDash LMS > Add-Ons and locate the Restrict Content Pro for LearnDash add-on. Click Now and once the installation is complete, click the Activate plugin button.

Option 2: Manual Upload #
Download the plugin file (remember that you must be logged in to download). In your WordPress admin dashboard go to Plugins > Add New and then Click to upload the plugin. You’ll need to browse for the plugin .zip that you downloaded previously. Once you find it (it may be in your computer’s Downloads folder), click Open, Install Now and finally, click the Activate Plugin button.
How it Works #
Before you can associate a LearnDash course with an RCP membership level, you need to:
- Create a LearnDash course
- Create a membership level in RCP
We’ll assume you have already created a LearnDash course.
Create a Membership Level #

In your WordPress admin area, go to Restrict > Membership Levels. Once you’re there, fill out any pertinent information about your membership. The Restrict Content Pro documentation has a great article on creating membership levels.
Link a Course to a Membership Level #
Now it’s time to associate a LearnDash course(s)* to this membership level. This means that once someone signs up for this membership, they will automatically be granted access to the associated course.
* You can assign one, or multiple, LearnDash courses to a single membership level.

- On the Add New Level page, scroll to the bottom and look for Courses
- Select the course(s) to associate to this membership.
NOTE: Select multiple courses by holding down the CTRL key (CMD on Mac)
- When you’re finished, be sure to click the Add Membership Level button.
FAQ & Troubleshooting #
The most common reason for this is that something went wrong during signup, and the user was not successfully added to the membership level. Tocheck the status of a membership do the following:
Go to Restrict > Memberships in your WordPress admin dashboard and locate the customer in question. Next, check the status column. If you see the user has a status of Pending, check to see that you set up your payment gateway correctly. If the customer’s status is Active, and they still don’t have access to the associated LearnDash course, please open a support ticket.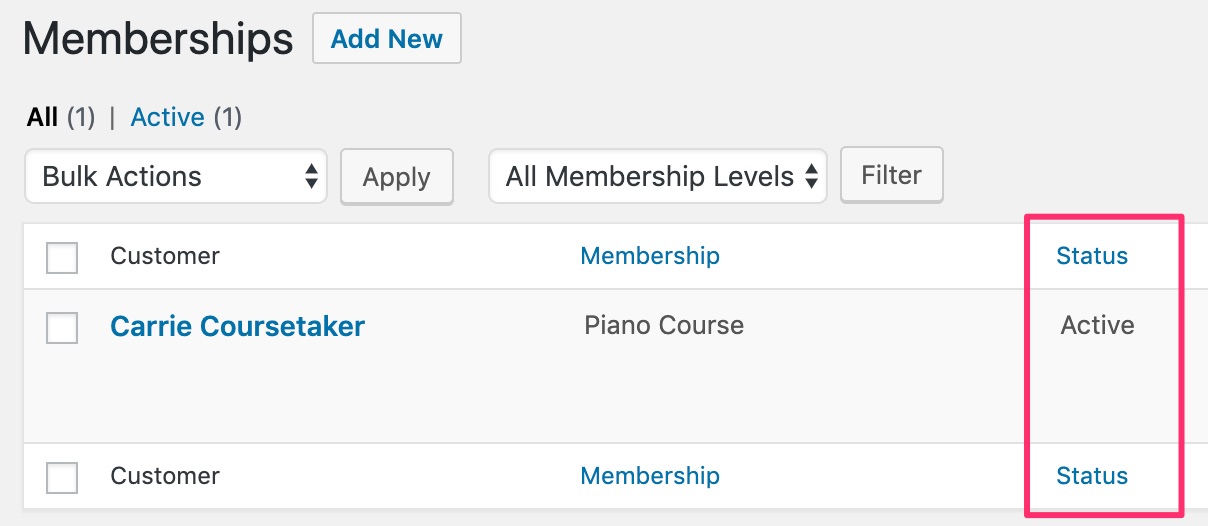
Here’s a complete list of Restrict Content Pro payment gateways.
Yes. See this Restrict Content Pro article for more information.