Gamification adds an extra layer of motivation and fun to online learning. By rewarding learners with badges, points, and achievements, course creators can boost engagement, reinforce progress, and encourage consistent participation. Although LearnDash does not include built-in gamification tools, it integrates seamlessly with popular WordPress plugins like BadgeOS and GamiPress.
This step-by-step guide explains how to set up gamification in LearnDash using either plugin, including how to display rewards and offer learners a sense of accomplishment as they move through a course.
What Is Gamification? #
In an e-learning context, gamification refers to applying game-like rewards to encourage learner participation. This can include:
- Awarding badges for task completion or high scores
- Granting points for engaging with course material
- Unlocking achievements tied to key learning milestones
These features can be especially helpful for:
- Encouraging learners to complete lessons on time
- Recognizing top performers or highly engaged users
- Making repetitive or challenging material more rewarding
Example use cases include giving a badge for passing all quizzes with a high score, awarding points for every lesson completed, or creating an achievement for finishing an entire course.
Getting Started #
LearnDash offers an Achievements add-on that allows course creators to award badges for specific learner actions such as completing lessons, passing quizzes, or finishing courses. For users who want a quick way to add gamification without installing third-party plugins, this option is a great starting point.
Alternatively, LearnDash integrates with third-party tools like GamiPress and BadgeOS.
What You’ll Need #
To use gamification in LearnDash, one of the following setups is required. Each option gives course creators the ability to award badges or achievements when learners complete key actions such as finishing a lesson or passing a quiz.
There are two main paths to choose from:
Option 1: Use the LearnDash Achievements Add-On #
The LearnDash Achievements add-on allows site owners to create badges, award points, and even display leaderboards — all from within LearnDash, without installing third-party plugins.
This option is ideal if you want to keep your site setup simple by using only LearnDash tools.
Option 2: Use a Third-Party Plugin (GamiPress or BadgeOS) #
To use either GamiPress or BadgeOS, you’ll need:
- The main plugin (GamiPress or BadgeOS), installed from the WordPress plugin directory
- The free LearnDash integration add-on for your chosen plugin (enables LearnDash triggers)
How to Add Gamification to LearnDash Courses #
Step 1: Install a Gamification Plugin #
Option 1: Install and Activate the Achievements Add-On #
- In the WordPress dashboard, go to LearnDash LMS > Add-Ons.
- Scroll down to the Available section
- Locate the LearnDash Achievements add-on
- Click the Download icon

- Scroll up to the Installed section
- Then click the Activate icon

Option 2: Install and activate GamiPress or Badge OS and the corresponding Learndash Integration:
- Install the GamiPress or Badge OS core plugin
- Install the GamiPress or Badge OS Learndash Integration by going to LearnDash LMS > Add-Ons in the WordPress Dashboard
- Scroll down to Available section
- Locate the LearnDash BadgeOS or GamiPress Integration
- Click the Download icon
- Scroll up to the Installed section
- Then the Activate icon
Step 2: Create Badges, Points, and Achievements #
Once your plugin and add-on are active, it’s time to create gamification elements and link them to LearnDash activities.
Creating an Achievement using the Learndash Achievement add-On #
- Click Add New Achievement

- Enter a Title for the achievement
- Enter a Message for the achievement
- Select from pre-uploaded images or upload a custom image

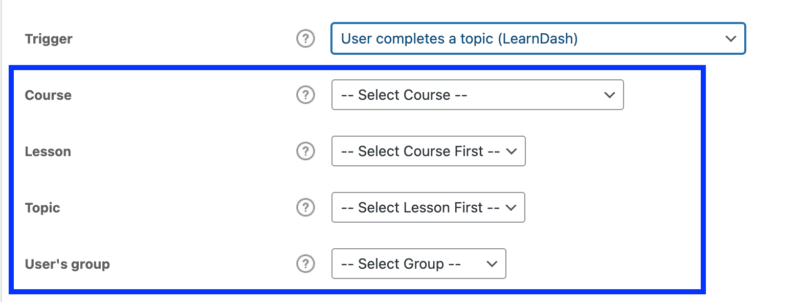
- Select LearnDash-related triggers (this is how students will earn the achievement).

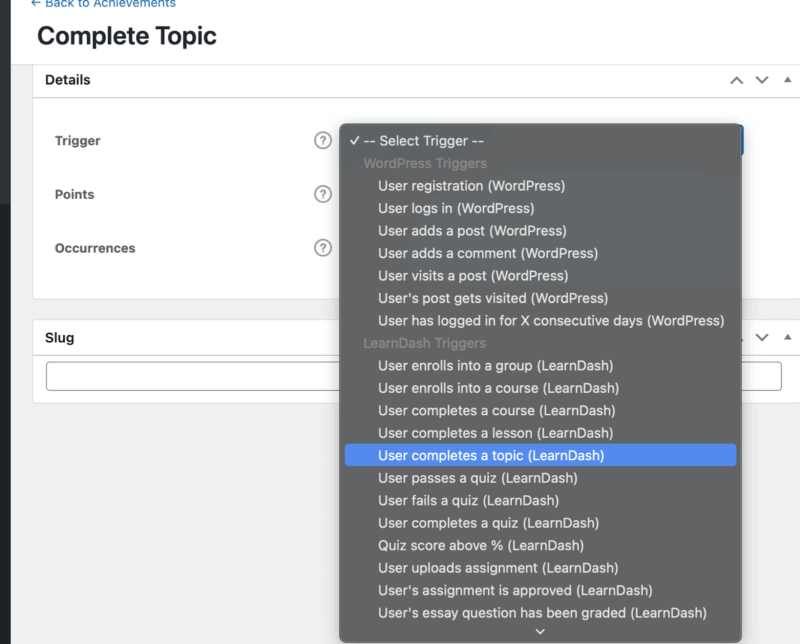
- Set Conditions as needed (these will vary based on the trigger you select).
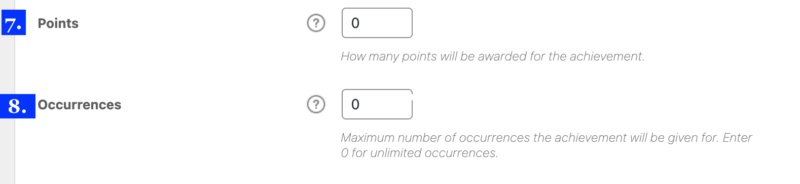
- Input how many Points they will earn for the achievement
- Enter the maximum number of Occurrences the achievement will be given. Enter 0 for unlimited occurrences.
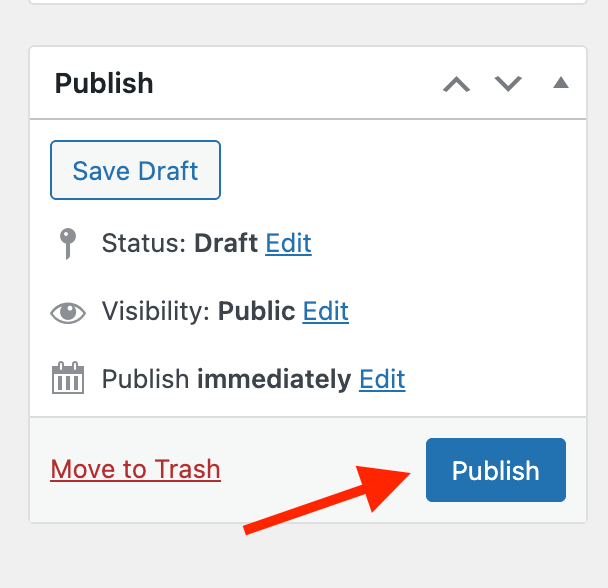
- Click Publish.
For more information and full setup details on the LearnDash Achievement add-on, see the official LearnDash guide: LearnDash Achievements Add-On Documentation.
Visit the developer documentation for the process of creating a BadgeOS badge or GamiPress point or achievement.
Step 4: Display Rewards on Learner Dashboards #
Once achievements, badges, and points are set up, it’s important to make them visible to learners. Displaying rewards helps reinforce motivation, showcases progress, and gives learners a sense of accomplishment.
Each platform handles reward display slightly differently. Below is a quick breakdown of how to show badges, points, and leaderboards using LearnDash Achievements, GamiPress, or BadgeOS.
Option 1: Displaying Achievements with the LearnDash Achievements Add-On #
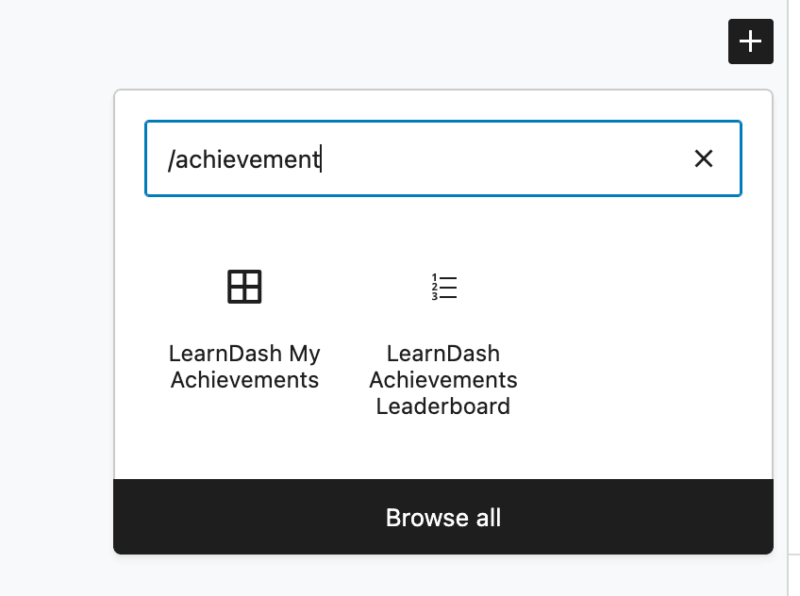
The easiest way to display earned achievements in LearnDash is by using the [ld_achievements_leaderboard] shortcode or block. This displays a list of users and their points based on their achievements.
How to Use the Shortcode or Block:
- From the WordPress dashboard, go to Pages > Add New or edit an existing page
- Add a block or content section, and insert the shortcode or block
- Publish the page
Available Shortcodes & Blocks
- [ld_achievements_leaderboard] displays a list of users and their points based on their achievements.
- [ld_my_achievements] displays a list of a logged-in user’s achievements alongside the achievements icon and its title when you hover over the icon.
View the available LearnDash Achievements shortcodes and blocks.
Option 2: Displaying Rewards with GamiPress #
GamiPress includes a wide variety of shortcodes and blocks to help display badges, points, ranks, and more. These can be added to any page, sidebar, or course content area.
Common GamiPress Shortcodes & Blocks:
- [gamipress_achievement]-Display a single achievement
- [gamipress_achievements] – Displays a list of earned achievements
How to Add a Rewards Page:
- Create a new page in WordPress
- Add one or more of the above shortcodes to display the desired information
- Publish the page and test it with a learner account
Customization Tip: GamiPress shortcodes offer parameters to filter by type, limit results, or show achievements from specific courses.
Documentation Resource: For advanced display options, see the GamiPress shortcode guide and block documentation on the GamiPress website.
Option 3: Displaying Badges with BadgeOS #
BadgeOS uses WordPress shortcodes and blocks to show earned badges. While it may not offer as many visual features compared to GamiPress, it offers solid integration when configured correctly.
Common Shortcodes & Blocks:
- [badgeos_achievements_list] – Displays a list of achievements
- [badgeos_user_earned_points] – list of the points earned by the user
How to Add a Rewards Page:
- Create a new page in WordPress
- Add one or more of the above shortcodes to display the desired information
- Publish the page and test it with a learner account
Documentation Resource: For a full list of supported shortcodes and layout options, visit the BadgeOS documentation page.
Best Practices for Displaying Rewards #
- Make It Easy to Find: Add a link to the rewards page in your site’s navigation menu or learner dashboard.
- Use Visual Hierarchy: Separate badges, points, and rankings clearly so learners can focus on one type of reward at a time.
- Check Mobile Layouts: Make sure achievement displays are responsive and legible on phones and tablets.
- Test with a Student Account: Log in as a test learner to verify what displays correctly after earning achievements.
Badge Design Tips #
Visual appeal plays a big role in how learners perceive badges. Strong badge design can help learners feel proud of their achievements.
Recommended Badge Design Elements #
- Icon or Symbol: Choose an image that visually represents the action or reward (e.g., checkmark for completion, trophy for excellence).
- Clear Text or Number: If using levels or points, make sure the text is easy to read at small sizes.
- Color Coding: Use colors to signal badge categories (e.g., blue for quizzes, green for progress, gold for excellence).
- Shape Consistency: Use the same shape or layout across all badges to create a unified style.
Tools for Creating Badges #
- Canva – Free design platform with badge templates and drag-and-drop icons
- Icon Packs – Use royalty-free icon libraries like Flaticon or Noun Project
File Format Tips #
- Save badges as PNG files with transparent backgrounds
- Use a square aspect ratio (e.g., 300×300 px or 500×500 px)
- Keep file sizes small to ensure fast page loading