Introduction #
Customizing your header bar and navigation menus elevates usability and reinforces branding in your LearnDash App. With the App Navigation Header, you can move the More Menu, add custom action buttons, and update icons all while freeing up a fifth slot in the Tab Bar for more direct access to key app sections.
This guide walks you through header configuration options, More Menu placement, and icon customization for a cleaner and more engaging user experience.
Key Features of the App Navigation Header #
- Customizable Action Buttons
Add and personalize two buttons in the header for quick actions like creating posts or messaging. - Relocatable More Menu
Move the More Menu from the Tab Bar to the top header, making space for an extra menu item. - Replaceable Icons
Change default action icons (e.g., Create Post, Add Group) to match your app’s branding.
Accessing Header Bar Settings #
- In your WordPress Dashboard, go to LearnDash App > Menus > Header Bar.
- Under Header Bar Settings, choose between:
- Left Aligned – Keeps the page title aligned to the left.
- Hidden – Hides the header on scroll.
- Left Aligned – Keeps the page title aligned to the left.

- Click Save Settings.
Configuring More Menu Placement #
- In the same settings area, find More Menu Placement.
- Choose one of the following:
- Bottom Tab Bar – Keeps the More Menu in its default position.
- Top Header Bar – Moves it to the top header.
- Bottom Tab Bar – Keeps the More Menu in its default position.
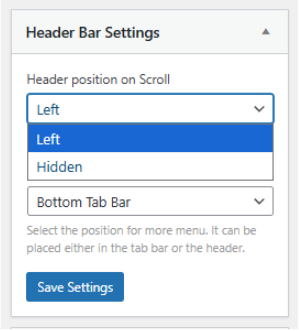
- Click Save Settings.
Troubleshooting and FAQs #
Q: Custom header icons look misaligned.
A: Upload square icons with transparent backgrounds, and enable Color Fill to match your Tab Bar style.