Introduction #
Access Controls help you manage who can see specific app content based on profile type, course enrollment, membership plan, or custom logic.
This guide shows how to enable Access Controls, configure restriction messages, set up access rules, and tailor menus for different user groups in your Learndash App.
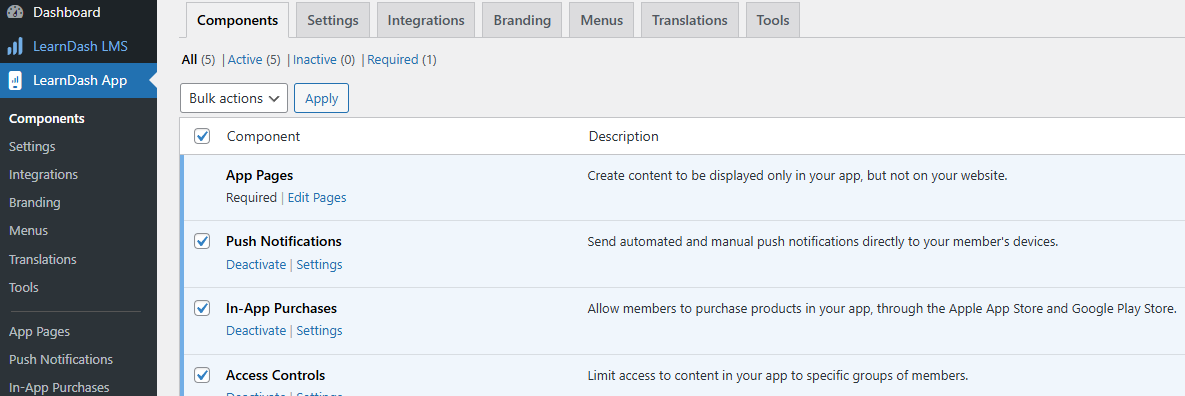
Enabling Access Controls #
- In your WordPress Dashboard, go to Learndash App > Components.
- Find Access Controls and click Activate.
If you were using Require Purchase to lock content, you’ll be prompted to migrate. Follow the Require Purchase to Access Controls migration guide before proceeding.
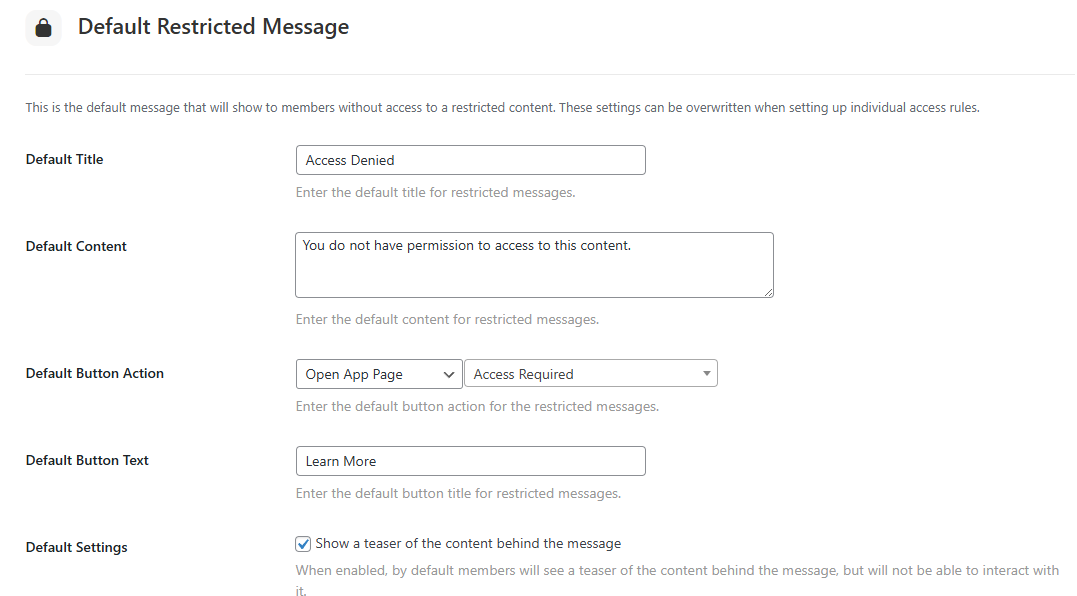
Setting the Default Restriction Message #
- Go to Learndash App > Settings > Access Controls.
- Under Default Restricted Message Content, enter the text you want users to see when trying to access locked content.

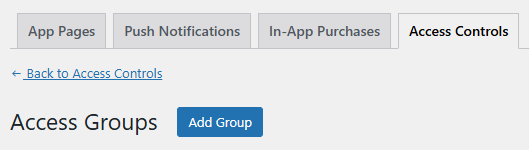
Creating Access Groups and Rules #
- Go to Learndash App > Access Controls > Access Groups.
- Click Add Group (e.g., “Premium Members,” “Course A Students”).
- Under Access Rules, assign the content to restrict:
- App Pages
- WordPress Pages
- Blog Posts
- LearnDash Courses

- Define who gets access based on:
- Profile Type
- Course Enrollment
- Membership Plan
- Or custom logic using the developer API
- Profile Type
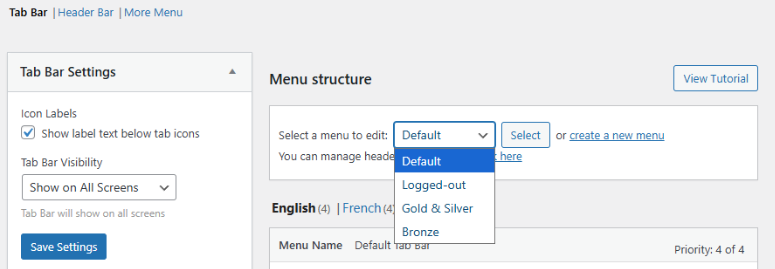
Controlling Menus by Access #
- Go to Learndash App > Menus.
- Use Access Controls to set what menu will appear depending on the group:
- Tab Bar items
- More screen menus
- Tab Bar items
Troubleshooting and FAQs #
Q: Why don’t I see the Access Controls option?
A: Update the Learndash App plugin and enable Access Controls under Learndash App > Components.
Q: My old Require Purchase settings aren’t working.
A: Complete the migration guide to convert them into Access Controls. Then disable the old Require Purchase setting.
Q: Members can still access restricted content.
A: Double-check that content is assigned to the correct Access Group and users meet the access conditions. Also, confirm your Default Restricted Message is not blank.
Q: How can I apply custom access conditions?
A: Use the developer API to implement advanced filtering logic.