Introduction #
Access Rules give you complete control over who sees what inside your Learndash App. Whether you want to lock premium content for paid members, hide posts from guests, or create unique app flows for different member types, Access Rules let you build a fully personalized experience.
This guide walks you through enabling Access Controls, defining member segments with Access Groups, and applying rules to restrict login access, app pages, blog posts, and LearnDash courses.
Prerequisite #
Make sure Access Controls is enabled:
- In your WordPress Dashboard, go to Learndash App > Components.
- Click Activate next to Access Controls.
- Once active, go to Learndash App > Access Controls to begin creating rules.

Configuring General App Access #
You can restrict access to the entire app based on login status or membership.
- Go to Learndash App > Access Controls > General.
- Enable Restrict Access to limit app entry.

- Under Access Groups, set the access rules:

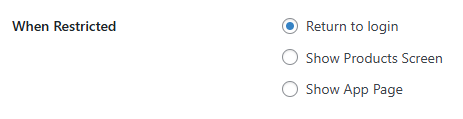
- Set a Restricted Action:
- Return to Login
- Show Product Screen
- Show App Page
- Click Save Changes.
Note: To hide the app from all logged-out users, enable Private App under Learndash App > Settings > General > Privacy.
Restricting App Pages, WordPress Pages & Blog Posts #
You can apply access rules to both native app screens and website content.
- In Learndash App > Access Controls, go to App Pages, Pages, or Posts.
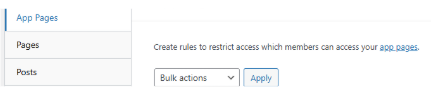
- Click + Add Rule next to the item you want to restrict.
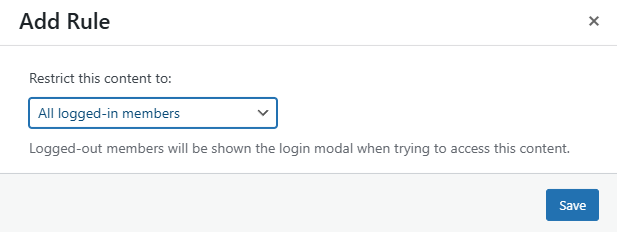
- Select your restriction:
- All logged-in members
- Specific Access Groups
- All logged-in members
- Choose a restriction message type:
- Default Message
- Custom Message (lets you add a title, custom copy, call-to-action, or content teaser)
- Default Message
- Click Save.
Note: Logged-out users will always see the login prompt before restricted content.
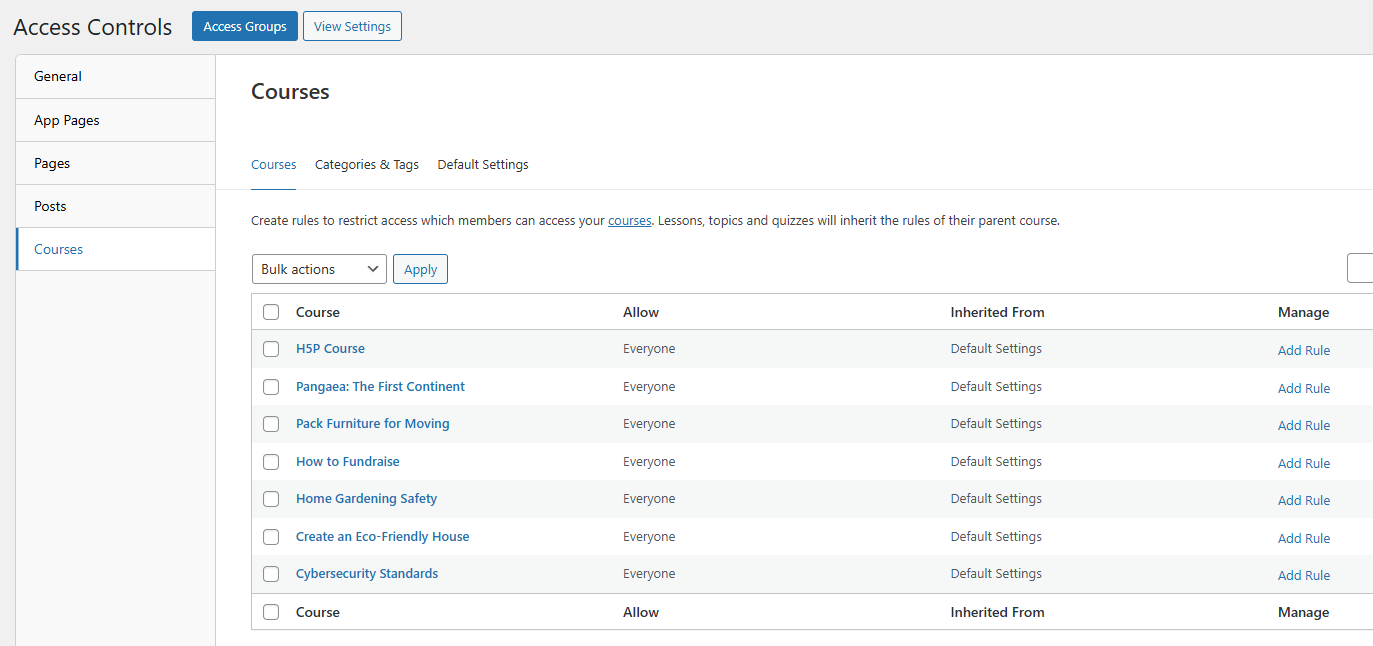
Restricting LearnDash Courses #
You can control access to individual courses, categories, tags, or apply a global default rule.
Restrict a Specific Course #
- Go to Learndash App > Access Controls > Courses > Courses.
- Click + Add Rule next to the course.
- Choose restriction type:
- All logged-in members
- Specific Access Groups
- All logged-in members
- Click Save.
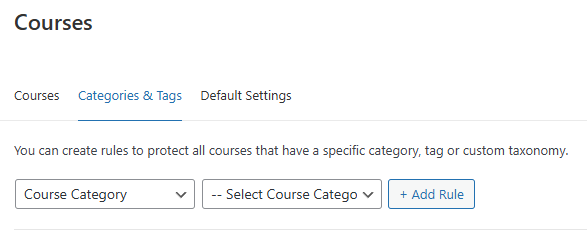
Restrict by Categories or Tags #
- Go to Learndash App > Access Controls > Courses > Categories & Tags.
- Add rules to categories, tags, or custom taxonomies.
- Set restriction and click Save.
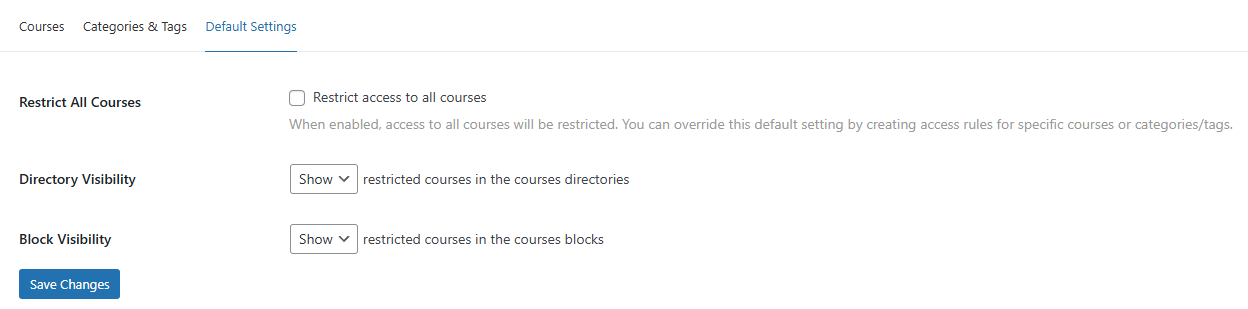
Set a Global Rule for All Courses #
- Go to Courses > Default Settings.
- Check Restrict All Courses.
- Choose the restriction type and Access Group.
- Decide whether to Hide restricted courses or Show with limited access.
- Click Save Changes.
Troubleshooting and FAQs #
Q: Restrict Access isn’t working for some users.
A: Go to Access Groups, hover over the group name, and click Recalculate Members to refresh the list.
Q: I don’t see my membership plugin in the dropdown.
A: Make sure the plugin (e.g., Restrict Content Pro, MemberPress) is installed and active.
Q: My custom message isn’t showing in the app.
A: Force-close and reopen the app to clear the cache and load the updated rules.
Q: Can I hide both a page and its menu item?
A: Yes. Add an Access Rule under Pages and also configure Menu Rules under Learndash App > Menus using the same group.
Q: Why do logged-out users see restricted pages?
A: Check if Restrict Access is enabled under General and verify your rule is targeting the correct audience.